The time has finally come. I’ve decided to start my build of the Millennium Falcon by De Agostini.
De Agostini’s Millennium Falcon is a replica of the 32-inch studio scale filming prop. It will be released in parts as an ongoing subscription consisting of a total of 100 issues with a new issues being published every week. That makes it a two-year build. Now, I am not really experienced with model building. This means that I have a lot of research to do in order to be able to complete this model with a reasonable result. But the build is said to be “for everyone”, and with enough research and studying, it should definitely be manageable.
I plan to document pretty much everything, and I’ll try and keep a written progress on my blog, as well as making a video series for my YouTube-channel. It’ll be a lot of extra work, but I think it’ll be worth it.
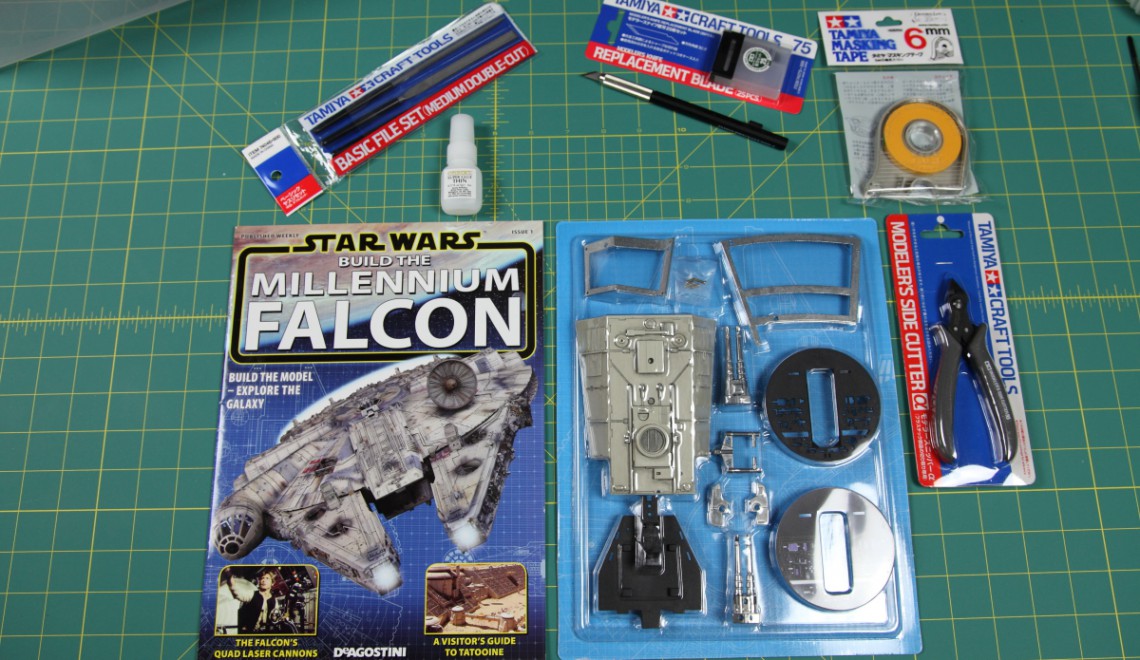
So, let’s have a look. Now, the first thing I did was to obtain a few tools. I still have a relatively long list of stuff that I need to acquire, but I had to start somewhere. These are the tools and equipment I initially picked up.
- Modeler’s knife
- Side cutters
- Masking tape, 6 mm (I won’t need this for a long time)
- Cocktail sticks (for applying glue and mixing paints)
- Set of files
- CA glue from citadel
- Cutting mat from Olfa (size: A1)
You can see all the stuff on the photo below, along with issue #1 and the parts that came with it.
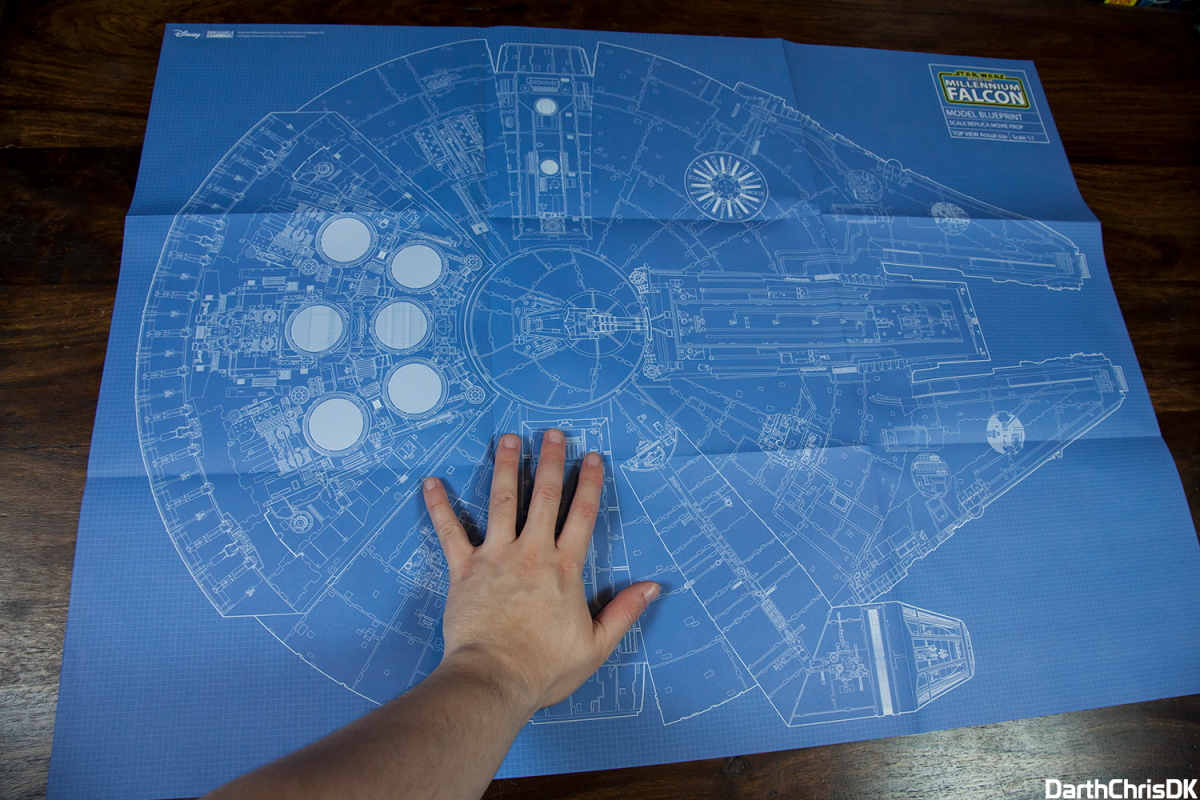
The first issue (issue #1) also comes with a huge and beautiful blueprint in the scale of 1:1 of the actual model I’ll be making. So it really gives you an impression of the size of the finished model.
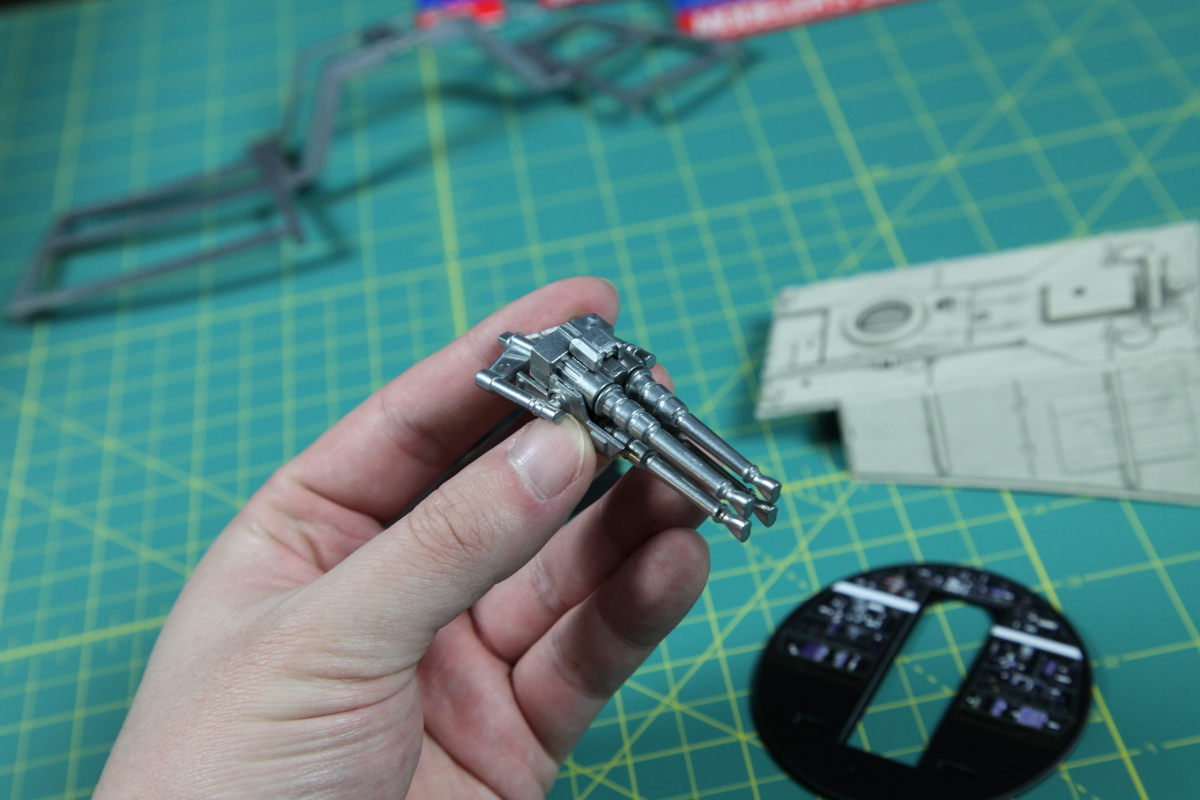
Let have a look at the parts that comes with issue #1. There’s a good mix of things, and it’s probably because the issue seeks to introduce customers to the materials being used in this build. So you get a bit of the exterior hull, the framework, the interior. On the photo below, you won’t find the frame pieces, but I’ll add a photo of these a bit further down. I’ve already added the sticker to the back wall of the cockpit as well, and assembled the quad laser turret. The turret parts are made from metal, as is the case with the frame pieces. The other parts are made from ABS plastic, I believe.

The assembled quad laser turret (and the assembled frame in the back, with parts from issue #2).
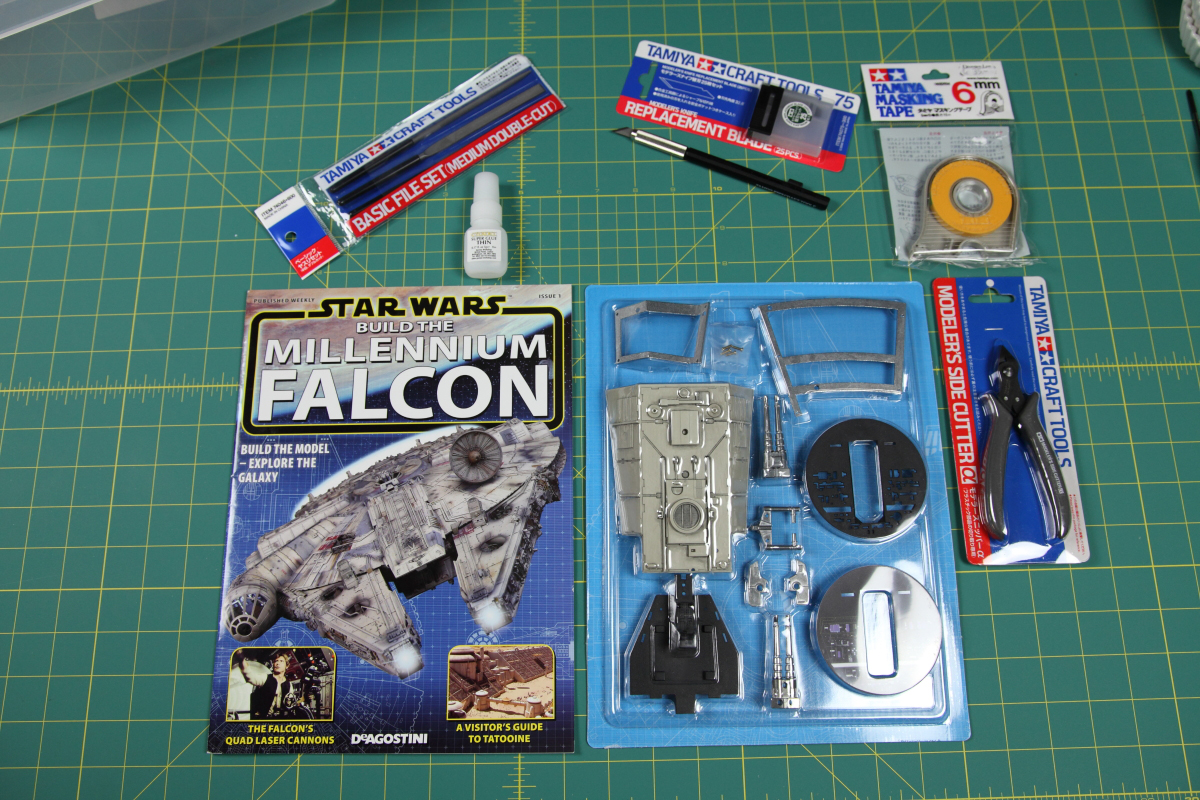
I’ve actually already cracked open the parts from issue #2, and you can see them on the photo below. Here, you can also see the assembled frame using the parts that came with issue #1 and #2. It also features mixed parts, i.e. some interior parts, some of the exterior hull (turret area) and the frame pieces.
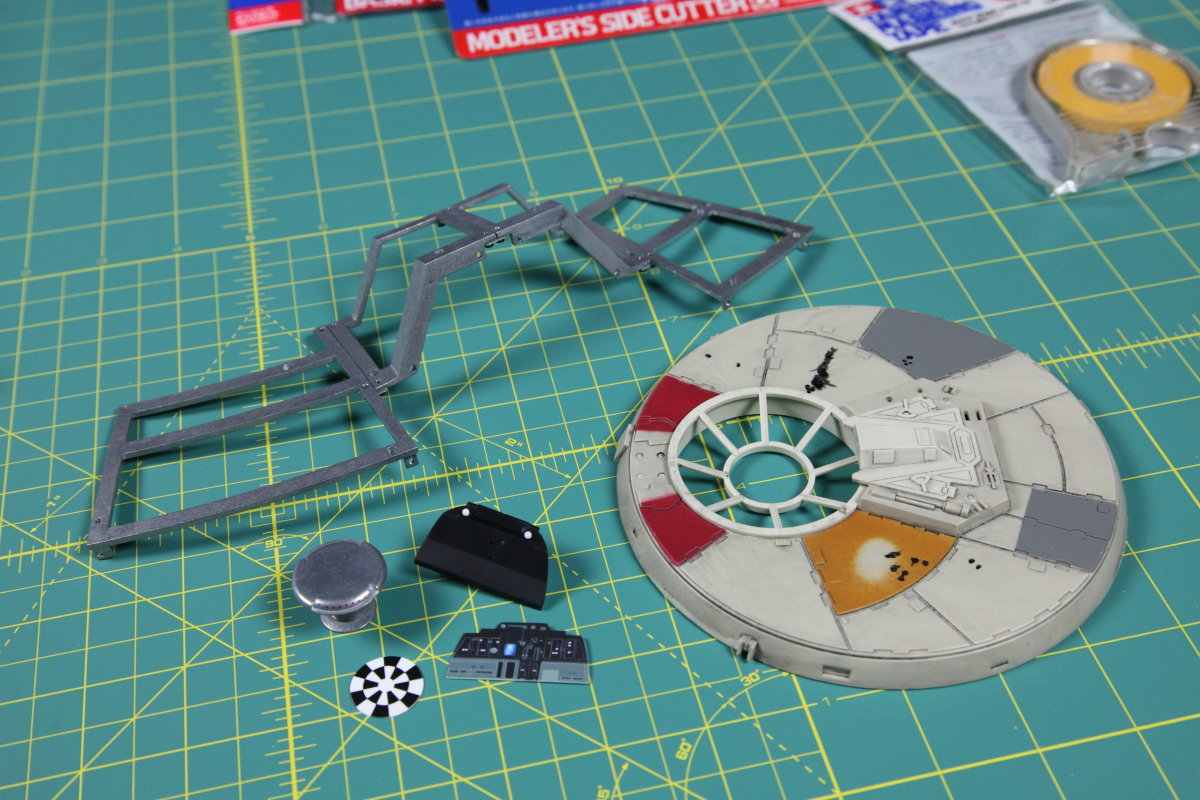
Issue #2 also came with a free screwdriver that I’ll be using. I don’t know of the quality of it, but it is easily replaceable if needed.

I’ll be repainting the entire model. The interior parts I’ll probably do over time, but the exterior will be done once it’s all assembled. I’ll be following the official instructions as closely as possible. Both the videos and the instructions provided in the magazines and on the official forum.
This is a huge project (to me) and there’s going to be incredibly many small bits and pieces to manage. So one of the most important aspects about this build is to maintain a good overview of all these parts. Some of the parts that you get are supposed to be used later, and for that reason, having a good storage space for these things, and keeping track of which parts you got with which issues is essential. So I’ve picked up a container (more might be necessary later). I also picked up some trays that I’ll be using when assembling, just in order to keep my small screws and bits in check. Oh, and I also had a spare plastic container from some frozen yoghurt that I’ll be using for ad hoc storage needs.

I’m really excited about this project, and I can’t wait to get further into the build. I still have a lot of stuff that I need to acquire in terms of tools and other stuff (paints, brushes, etc). I’ll be sure to also include these things in my regular updates.
Below, you’ll find my two first videos in my series of videos covering this build.


Hej,
Super fedt projekt du er i gang med 🙂
Hvor har du købt abonnement på den henne?
Mvh
Peter
Hej Peter. Det er købt direkte via firmaet. Så har jeg fået det sendt til en forwarding-adresse i England. Så har jeg fået det sendt videre derfra til DK.